Tag Archives: homemade

Homemade Tomato Sauce for Apres- anything (guest post by Johanne DuRocher)

final 3 jars

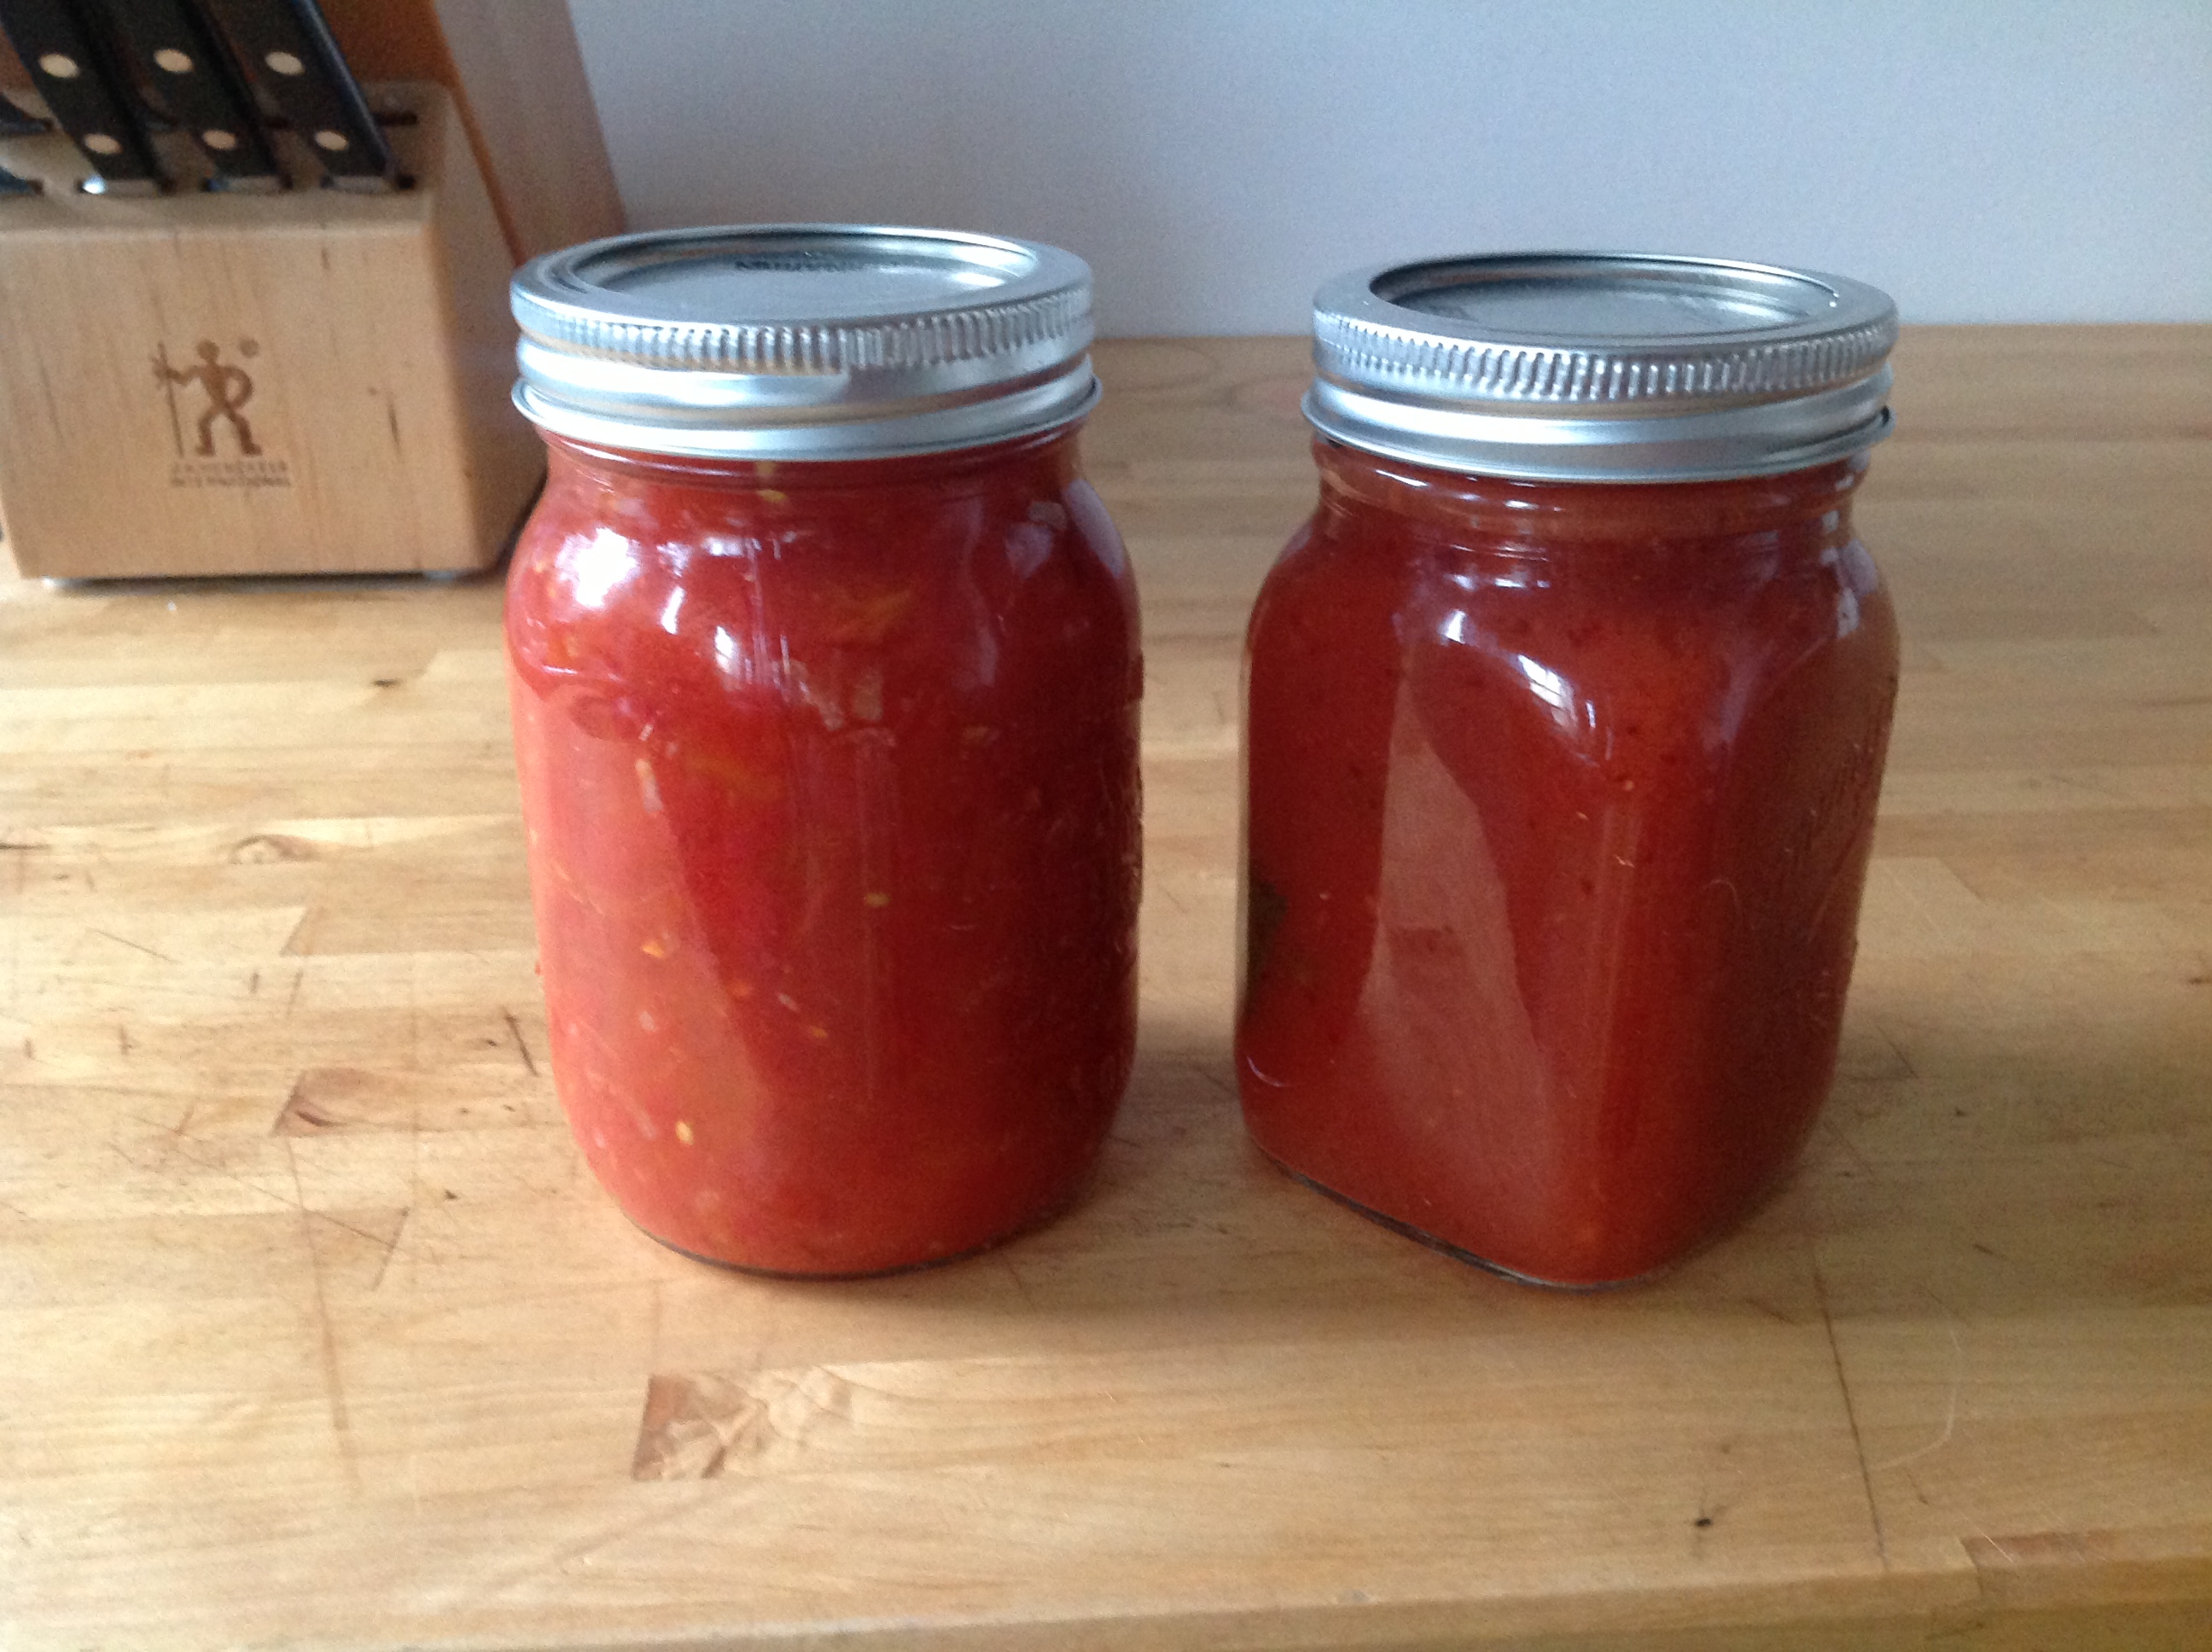
Behold: two and a half jars of homemade tomato sauce! Easier and faster than you can say presto

Intro from Sue:  Finally am posting this witty and perfectly timely recipe for making your own homemade sauce as we head into March and another deep freeze.  It comes from the muli-talented and multi-tasking Johanne DuRocher.  When is there NOT a time for deliciouso home made sauce?  I shudder to realize Johanne created this wonderful post for me when tomatoes where seasonal and came in baskets–but I like to roast tomatoes in the winter before I use them to intensify the flavour and think you will still get delightful results.  And now to the good stuff….

The title for this post actually is, Making tomato sauce when it’s your first time and you’re flying to Winnipeg in 36 hours. (And obviously not ready for either, nor are you Italian, but having a bushel of ripe tomatoes and enough wherewithal in the kitchen to wing it, it’s a go.)

It was Thursday night, pushed to the last minute. I still had, oh, say five hundred things to do before I was about to head out of town for one week. I can multitask.

It’s been years since I wanted to do this and so one day late in the summer I rode home on my bicycle with a basket of roma tomatoes from the farmer’s market- that’s the first step in making sauce. I had even asked one of my Italian colleagues at work to take notes as she made sugo the weekend prior with her family. Sonia had a few pages of instructions for me about making it The Authentic Italian Way, which I really wanted to know and duplicate. I was pretty pumped- I wanted to achieve Italian flavours, not whatever sauce flavours I’d achieved before. I was very excited to make my sauce pass off as the real Italian home made sauce.

Sonia had all the steps mapped out. Step 1: the tomatoes must be quite ripe (check) and then “you put them through the machine that removes the skins and the seeds.”

There’s a machine? I didn’t know that but ok, I can do this, I can blanch, sister. I can seed. And then she said “and then the tomatoes are crushed,” and I said, pardon? “Oh yeah, the machine crushes them too at the same time.”

“Oh. So you mean *you* don’t do that-? But I could do that, right? I could blanch, seed, crush by hand?”

Already my authentic sauce dreams were starting to run. Making sauce the real Italian way is ambitious to even Italians (another sauce lesson). But they’re compulsive and can’t help themselves so there is sauce year after year.

When I came home on Thursday night, it was after a full office day, a hair dresser’s appointment and a gift shopping blitz for said Winnipeg trip. It was 8pm and I still had a list of to-dos, not to mention blanching.

This recipe is what happened on that night and, let me be the first thousandth person to tell you that everyone makes sauce differently. This I would call extreme sauce making. No blanching (obviously) no seeding (as if) and I crushed with my potato masher. It was also 30 degrees in my place.

If you can still find a nice basket of farmer’s market tomatoes, get your sauce going and then get thee to Winnipeg. And note: I finally ate this sauce with spaghetti pasta and it is incredibly delicious- has a lovely garlic flavour, umami-lovin weight and tomatoeyness. I’ve also been told that it’s preferred to the real authentic Italian mama sauce we have. Ha!

Johanne’s Tomato Sauce

Ingredients

1 large basket of Roma tomatoes, quite ripe (about 26)

1 bulb of garlic (I used green garlic but regular garlic is equally fine)

1/4 onion, grated (this proved successful for spraying my dress, not scenting the sauce this time. Cheese grater issues, but do your best)

Sea salt

Olive oil

Jars for canning

Step 1. Slice your tomatoes in half, length wise, and then place them on an olive-oil greased foil or parchment paper or straight up on a baking sheet flesh side up. Basted them with olive oil if desired. Sprinkle with sea salt.

Raw sliced

So far so good on slicing the tomatoes in half.

Side note: not all my tomatoes fit onto my baking sheet so I seeded and diced the rest and reserved them raw, un-roasted, for later.

Reserved chopped

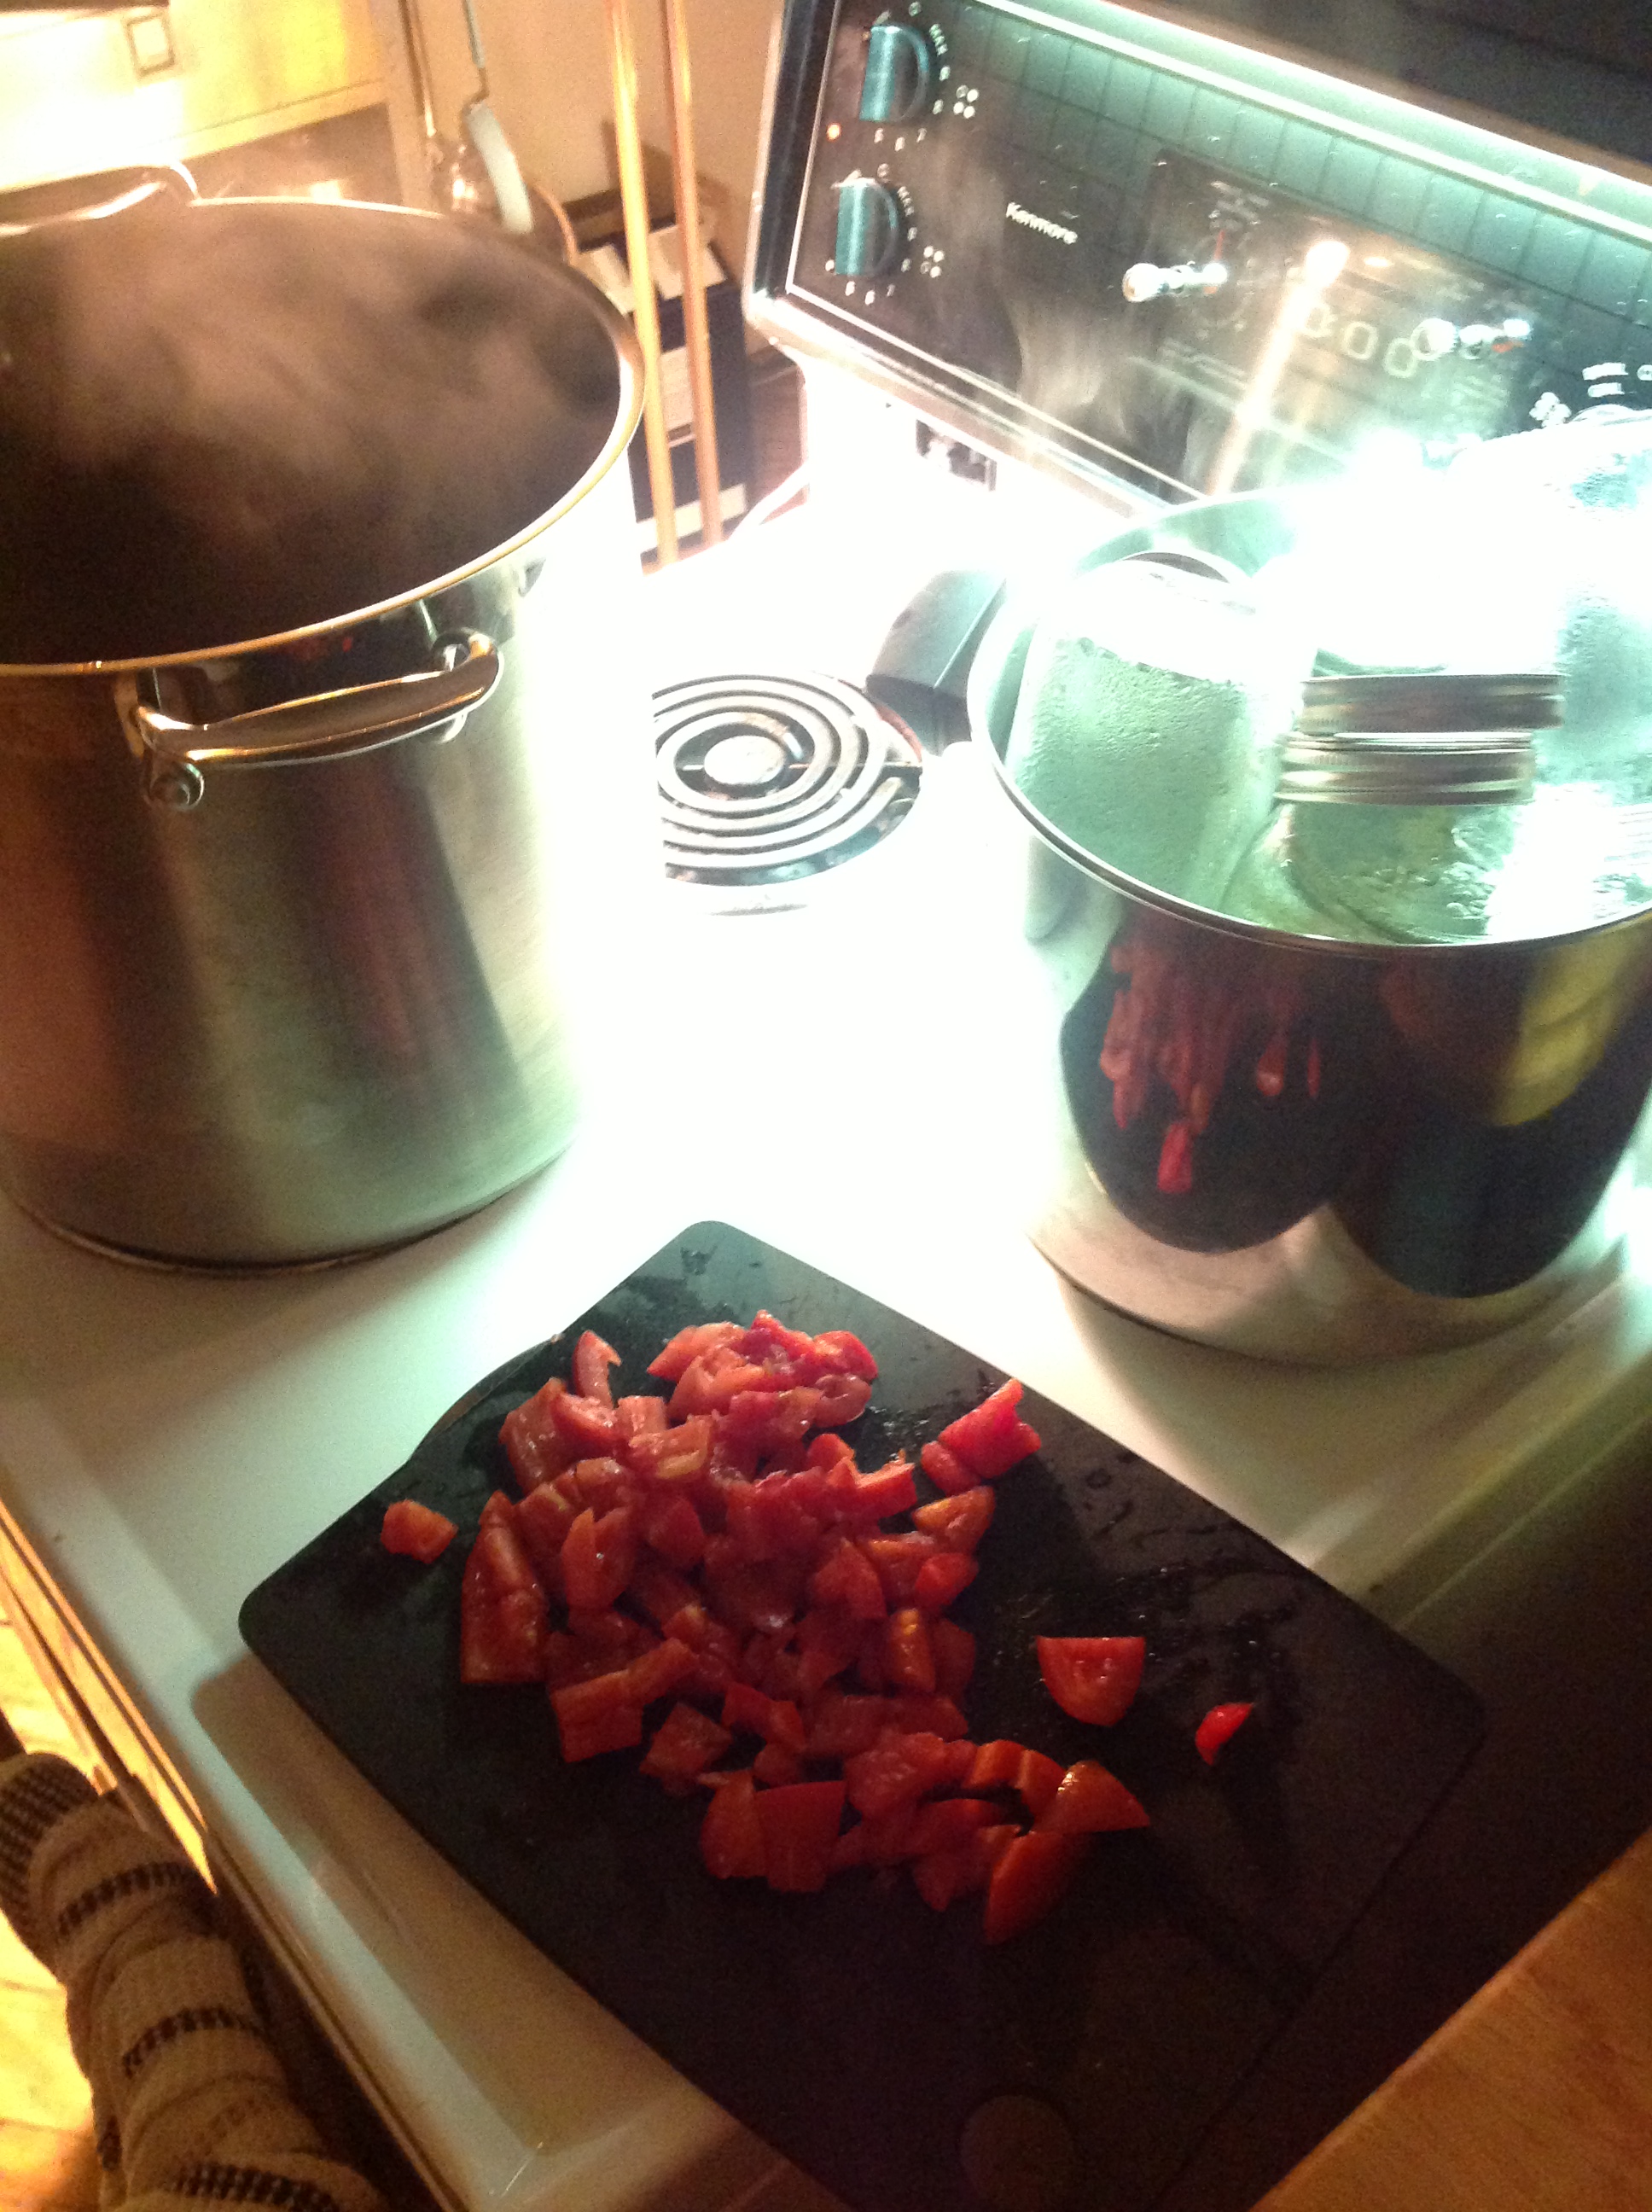
Two or three tomatoes didn’t fit on my baking tray so I coarsely chopped them and added them later.

Step 2. Place tomatoes in the oven at 350F for say, 40 minutes or when they look slightly deflated, like this:

baked

The roasting helps remove some of the water content and intensify the flavours

time

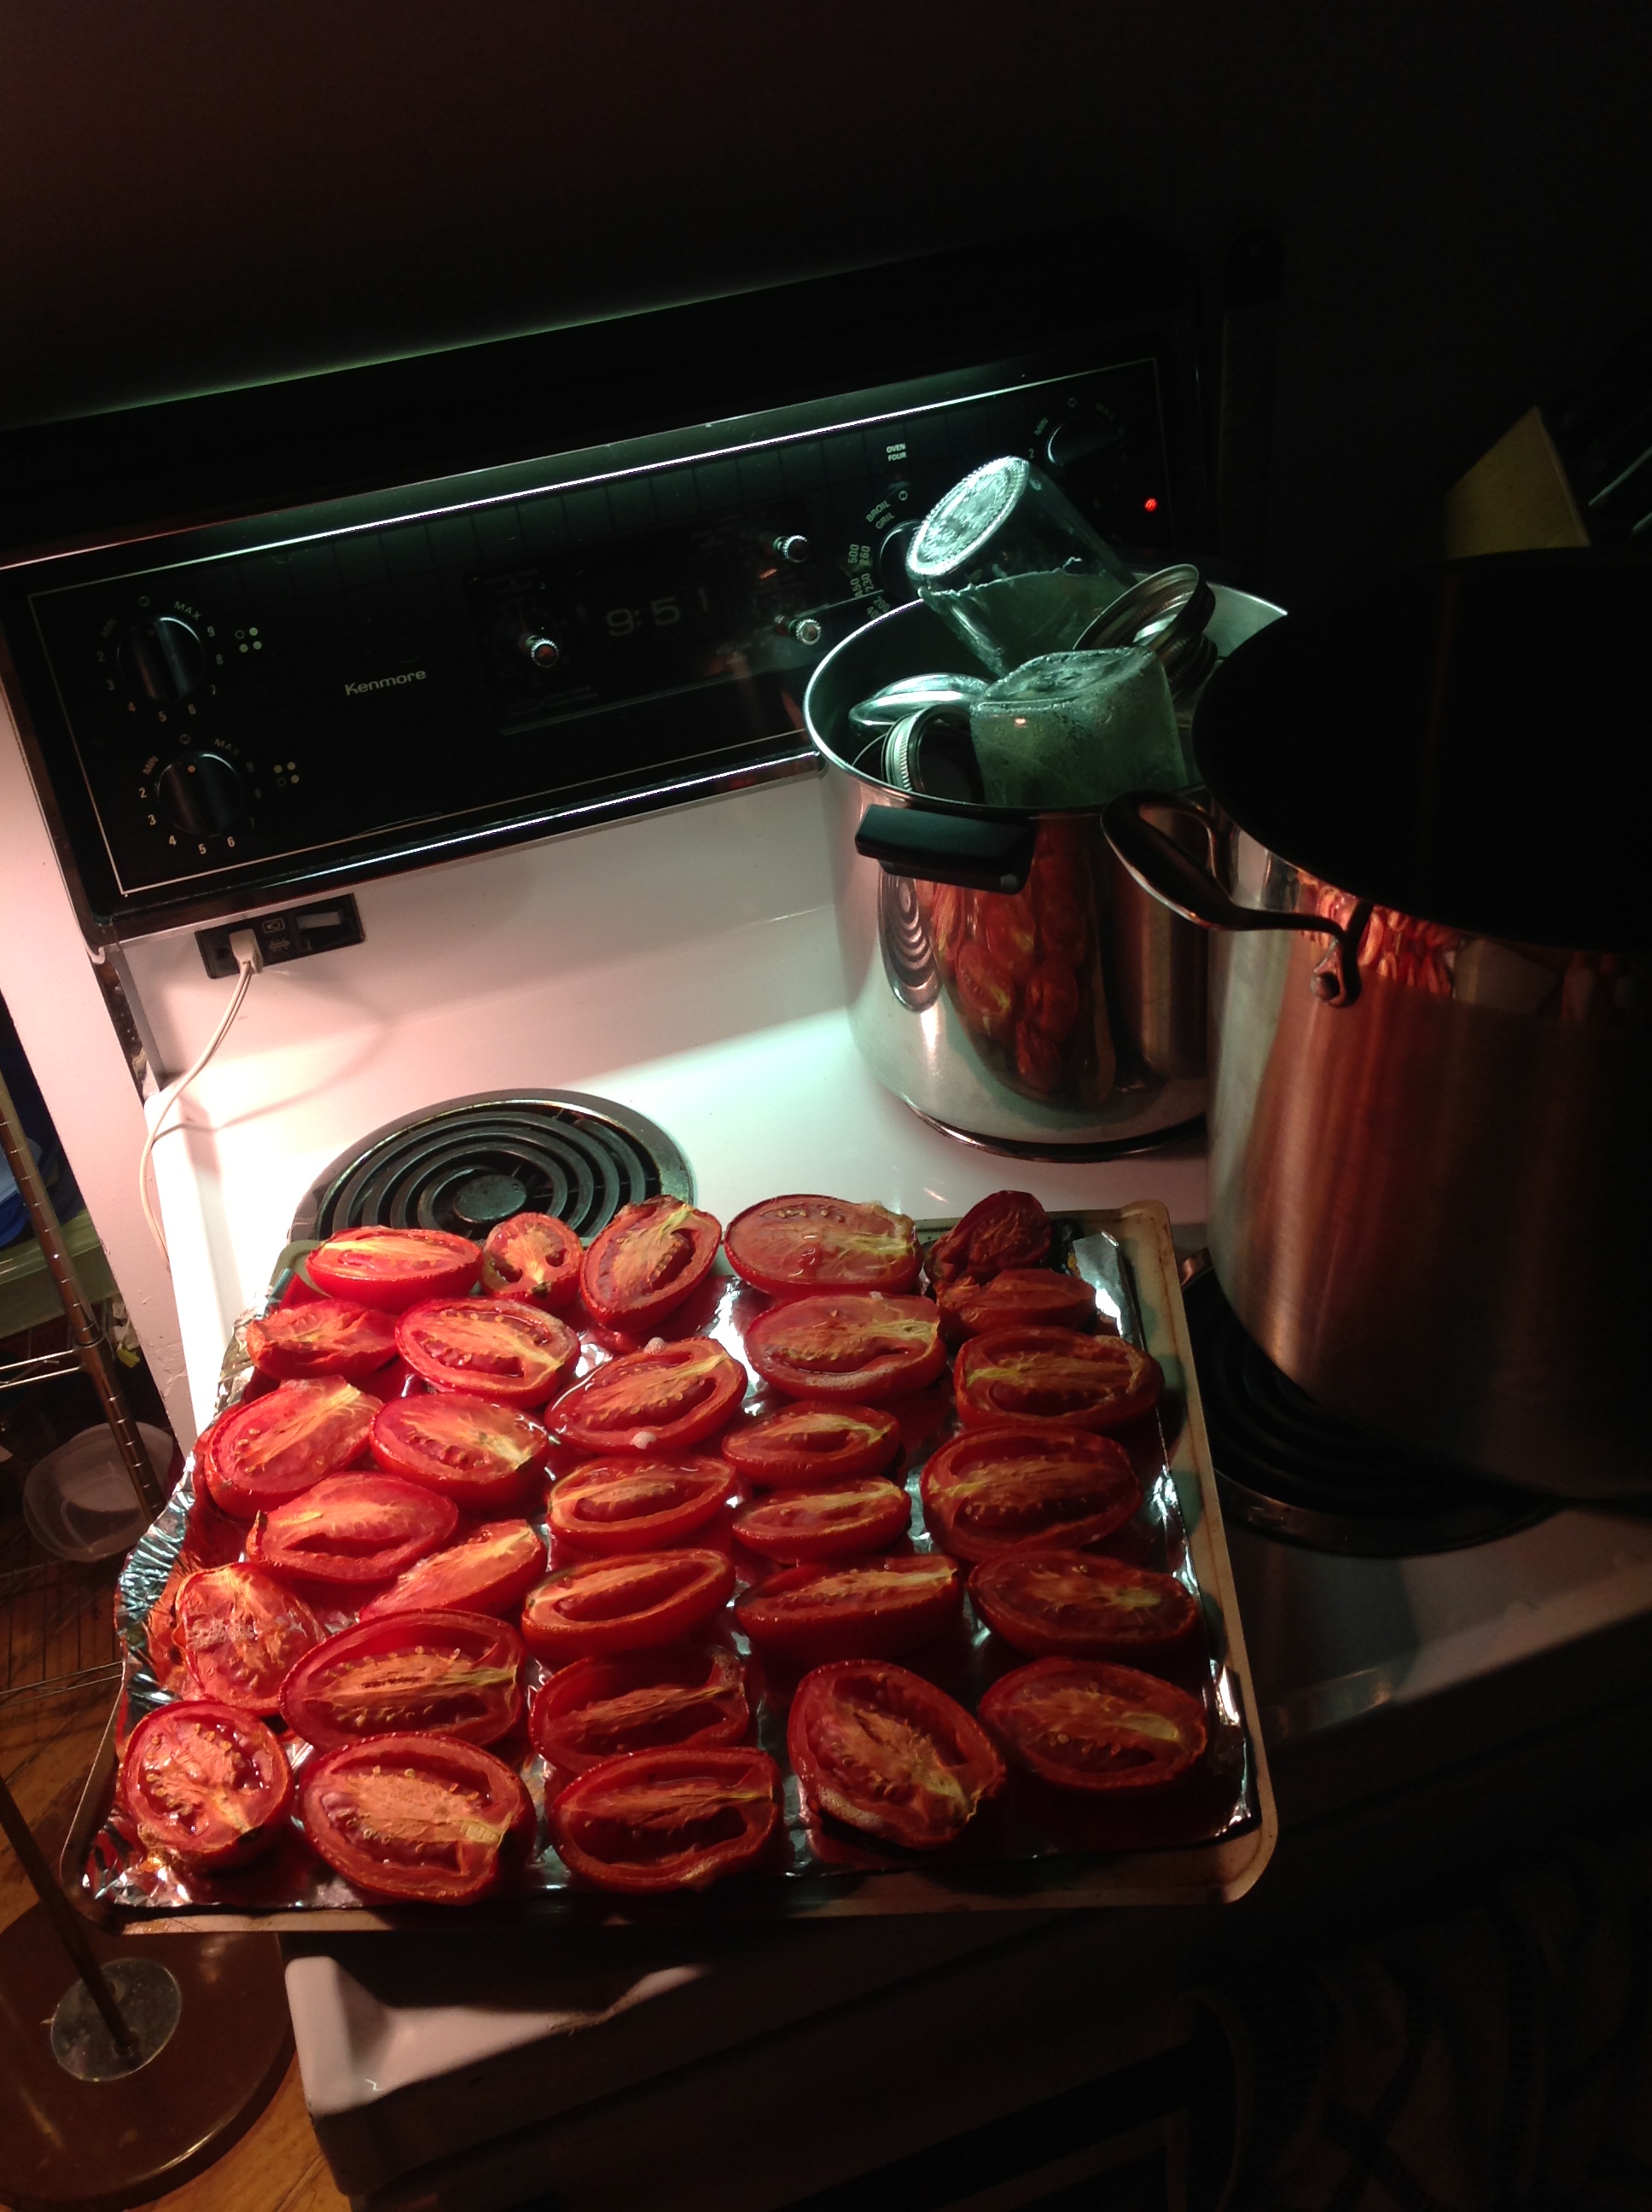
Note the time: 9:51PM and doing fine. It really didn’t take long to make this sauce.

Transfer roasted tomatoes to a large sauce pot. Add reserved tomatoes.

Prepare jars for canning: while the tomatoes are roasting, sterilize your jars by adding them and their lids (removed) to a large pot, then fill the pot with boiling water and continue to boil on the stove. Keep boiling as you make the sauce- can’t hurt to leave that going.

Sterile jars

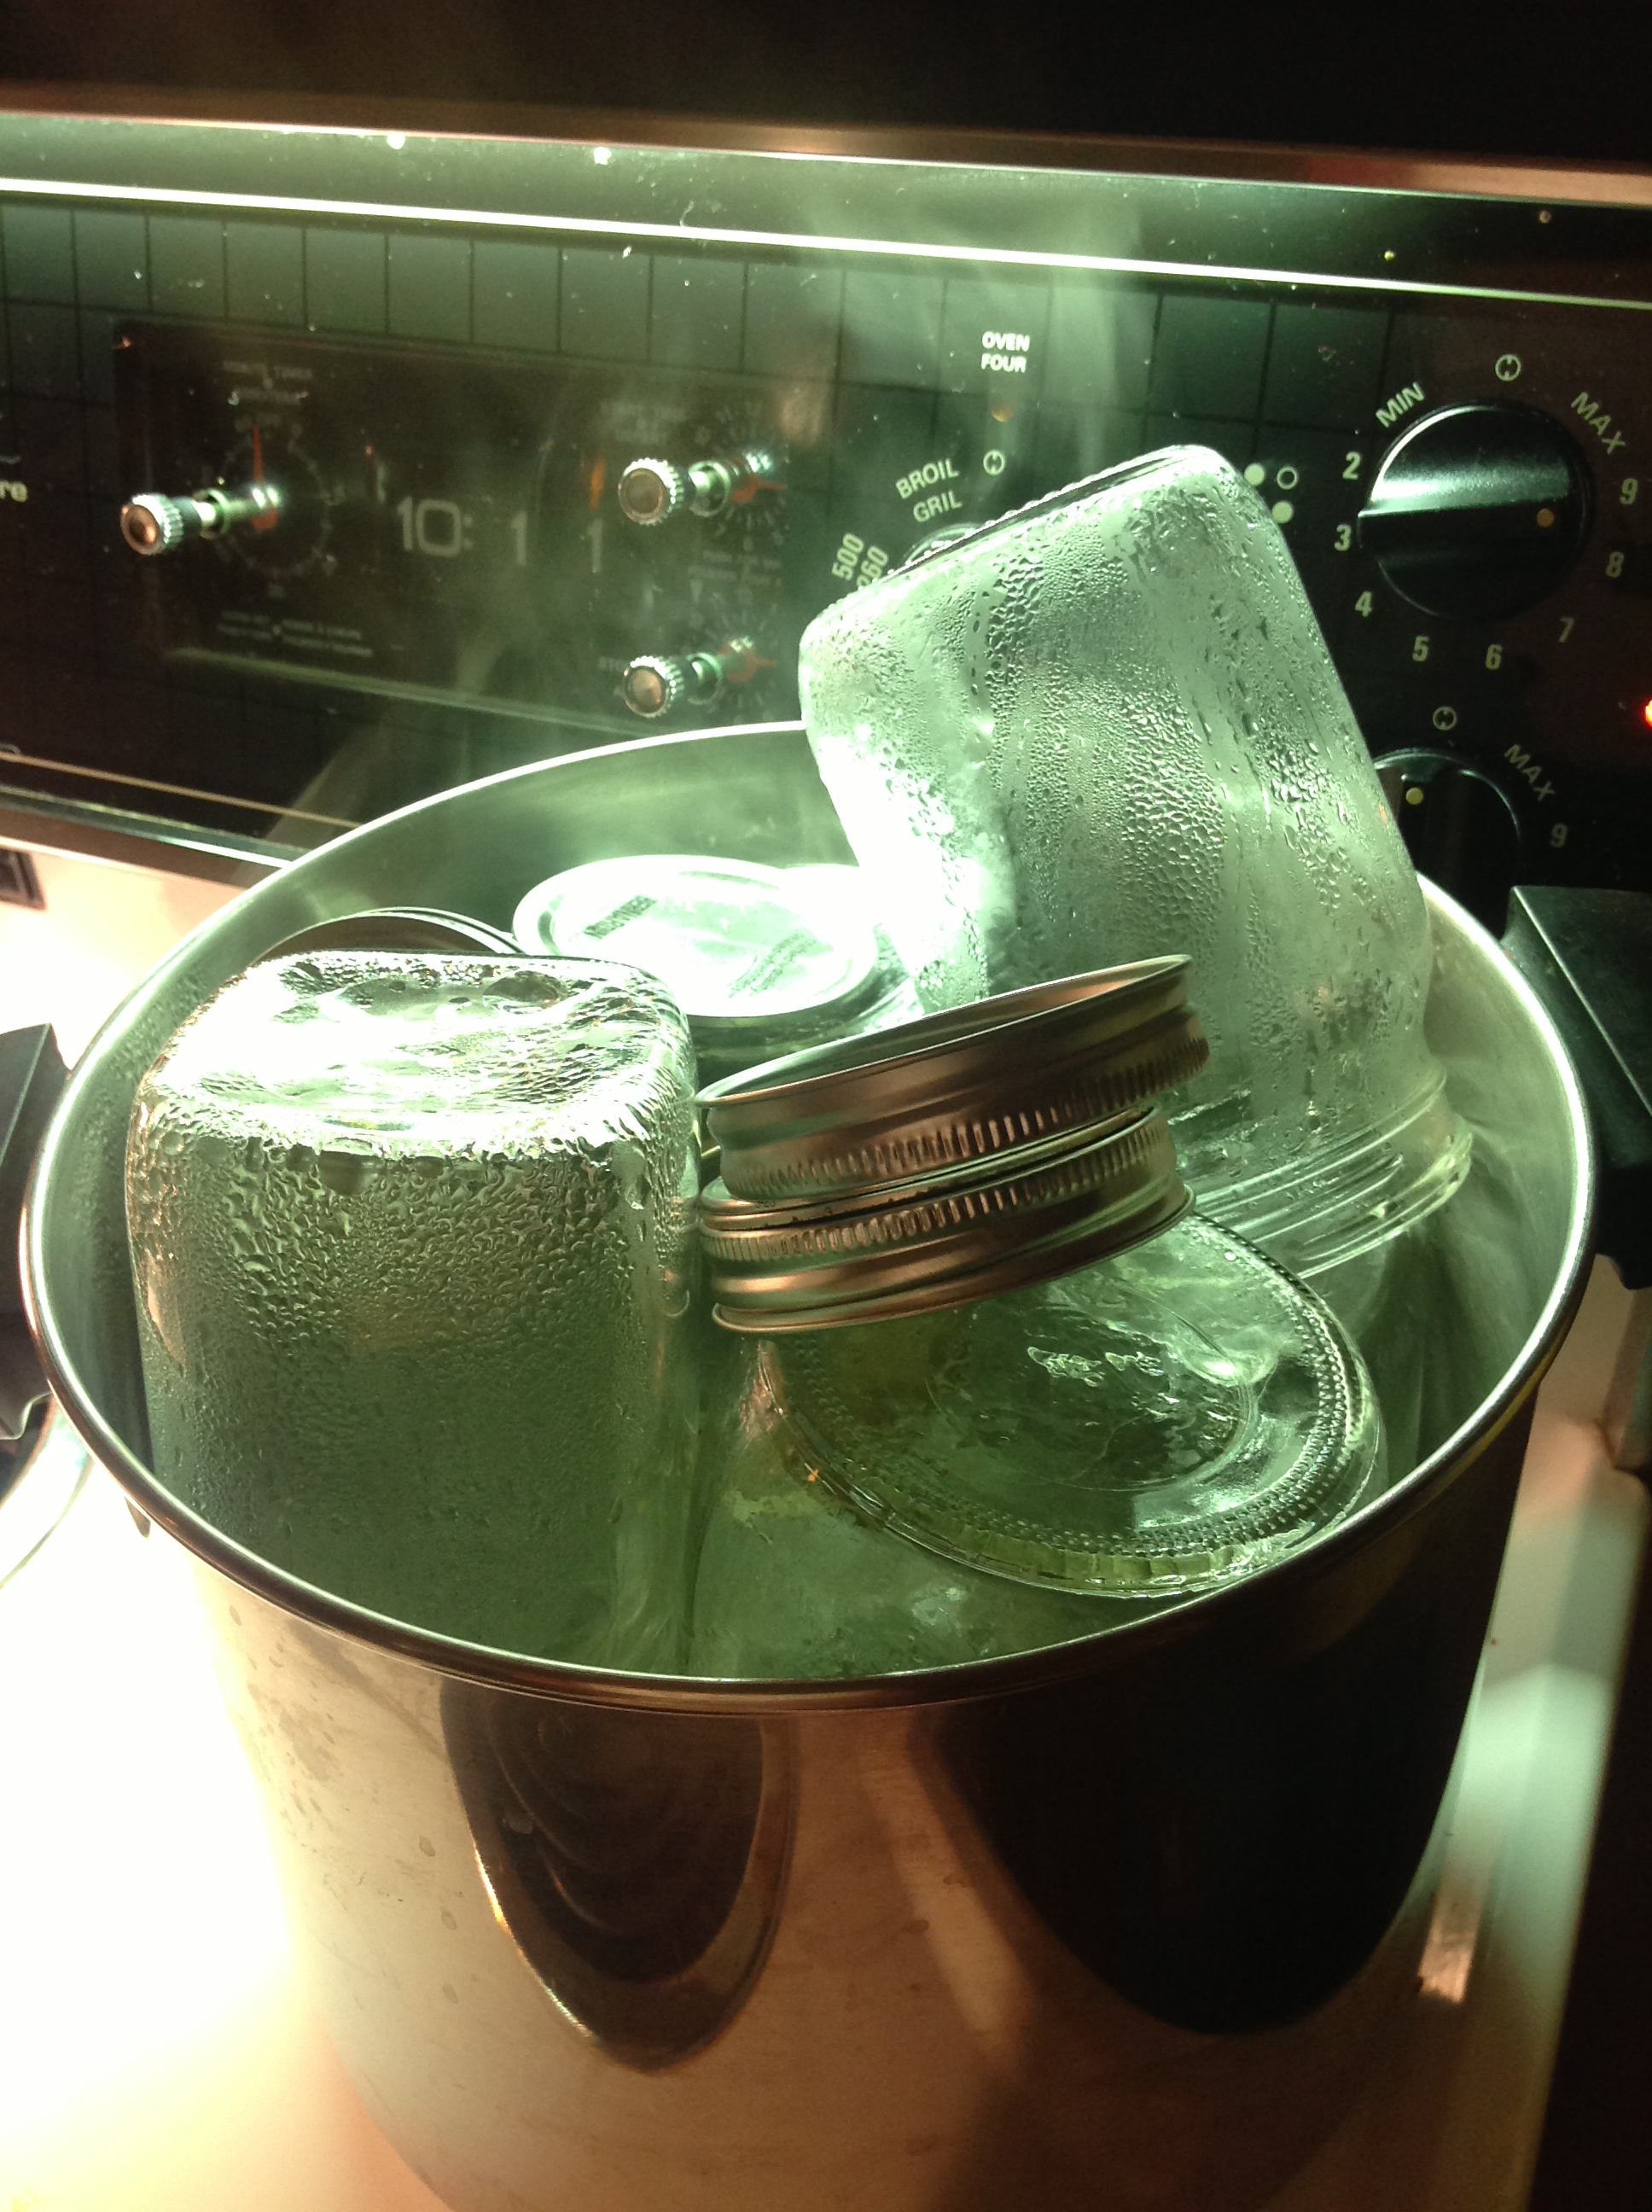
I read that 10 minutes ought to sterilize your jars but mine were in the boil for much longer while the sauce simmered.

Step 3: Back to your sauce: mash the tomatoes using a potato masher. I’m thinking an electrified device would also work and give you a smoother sauce, whereas the masher gives you a somewhat chunky sauce. Have fun.

Mashed

Now it smells amazing in your place.

Step 4:  Add an entire bulb of grated fresh green garlic. Grate 1/4 of an onion and add. Mash some more.

Ingredients

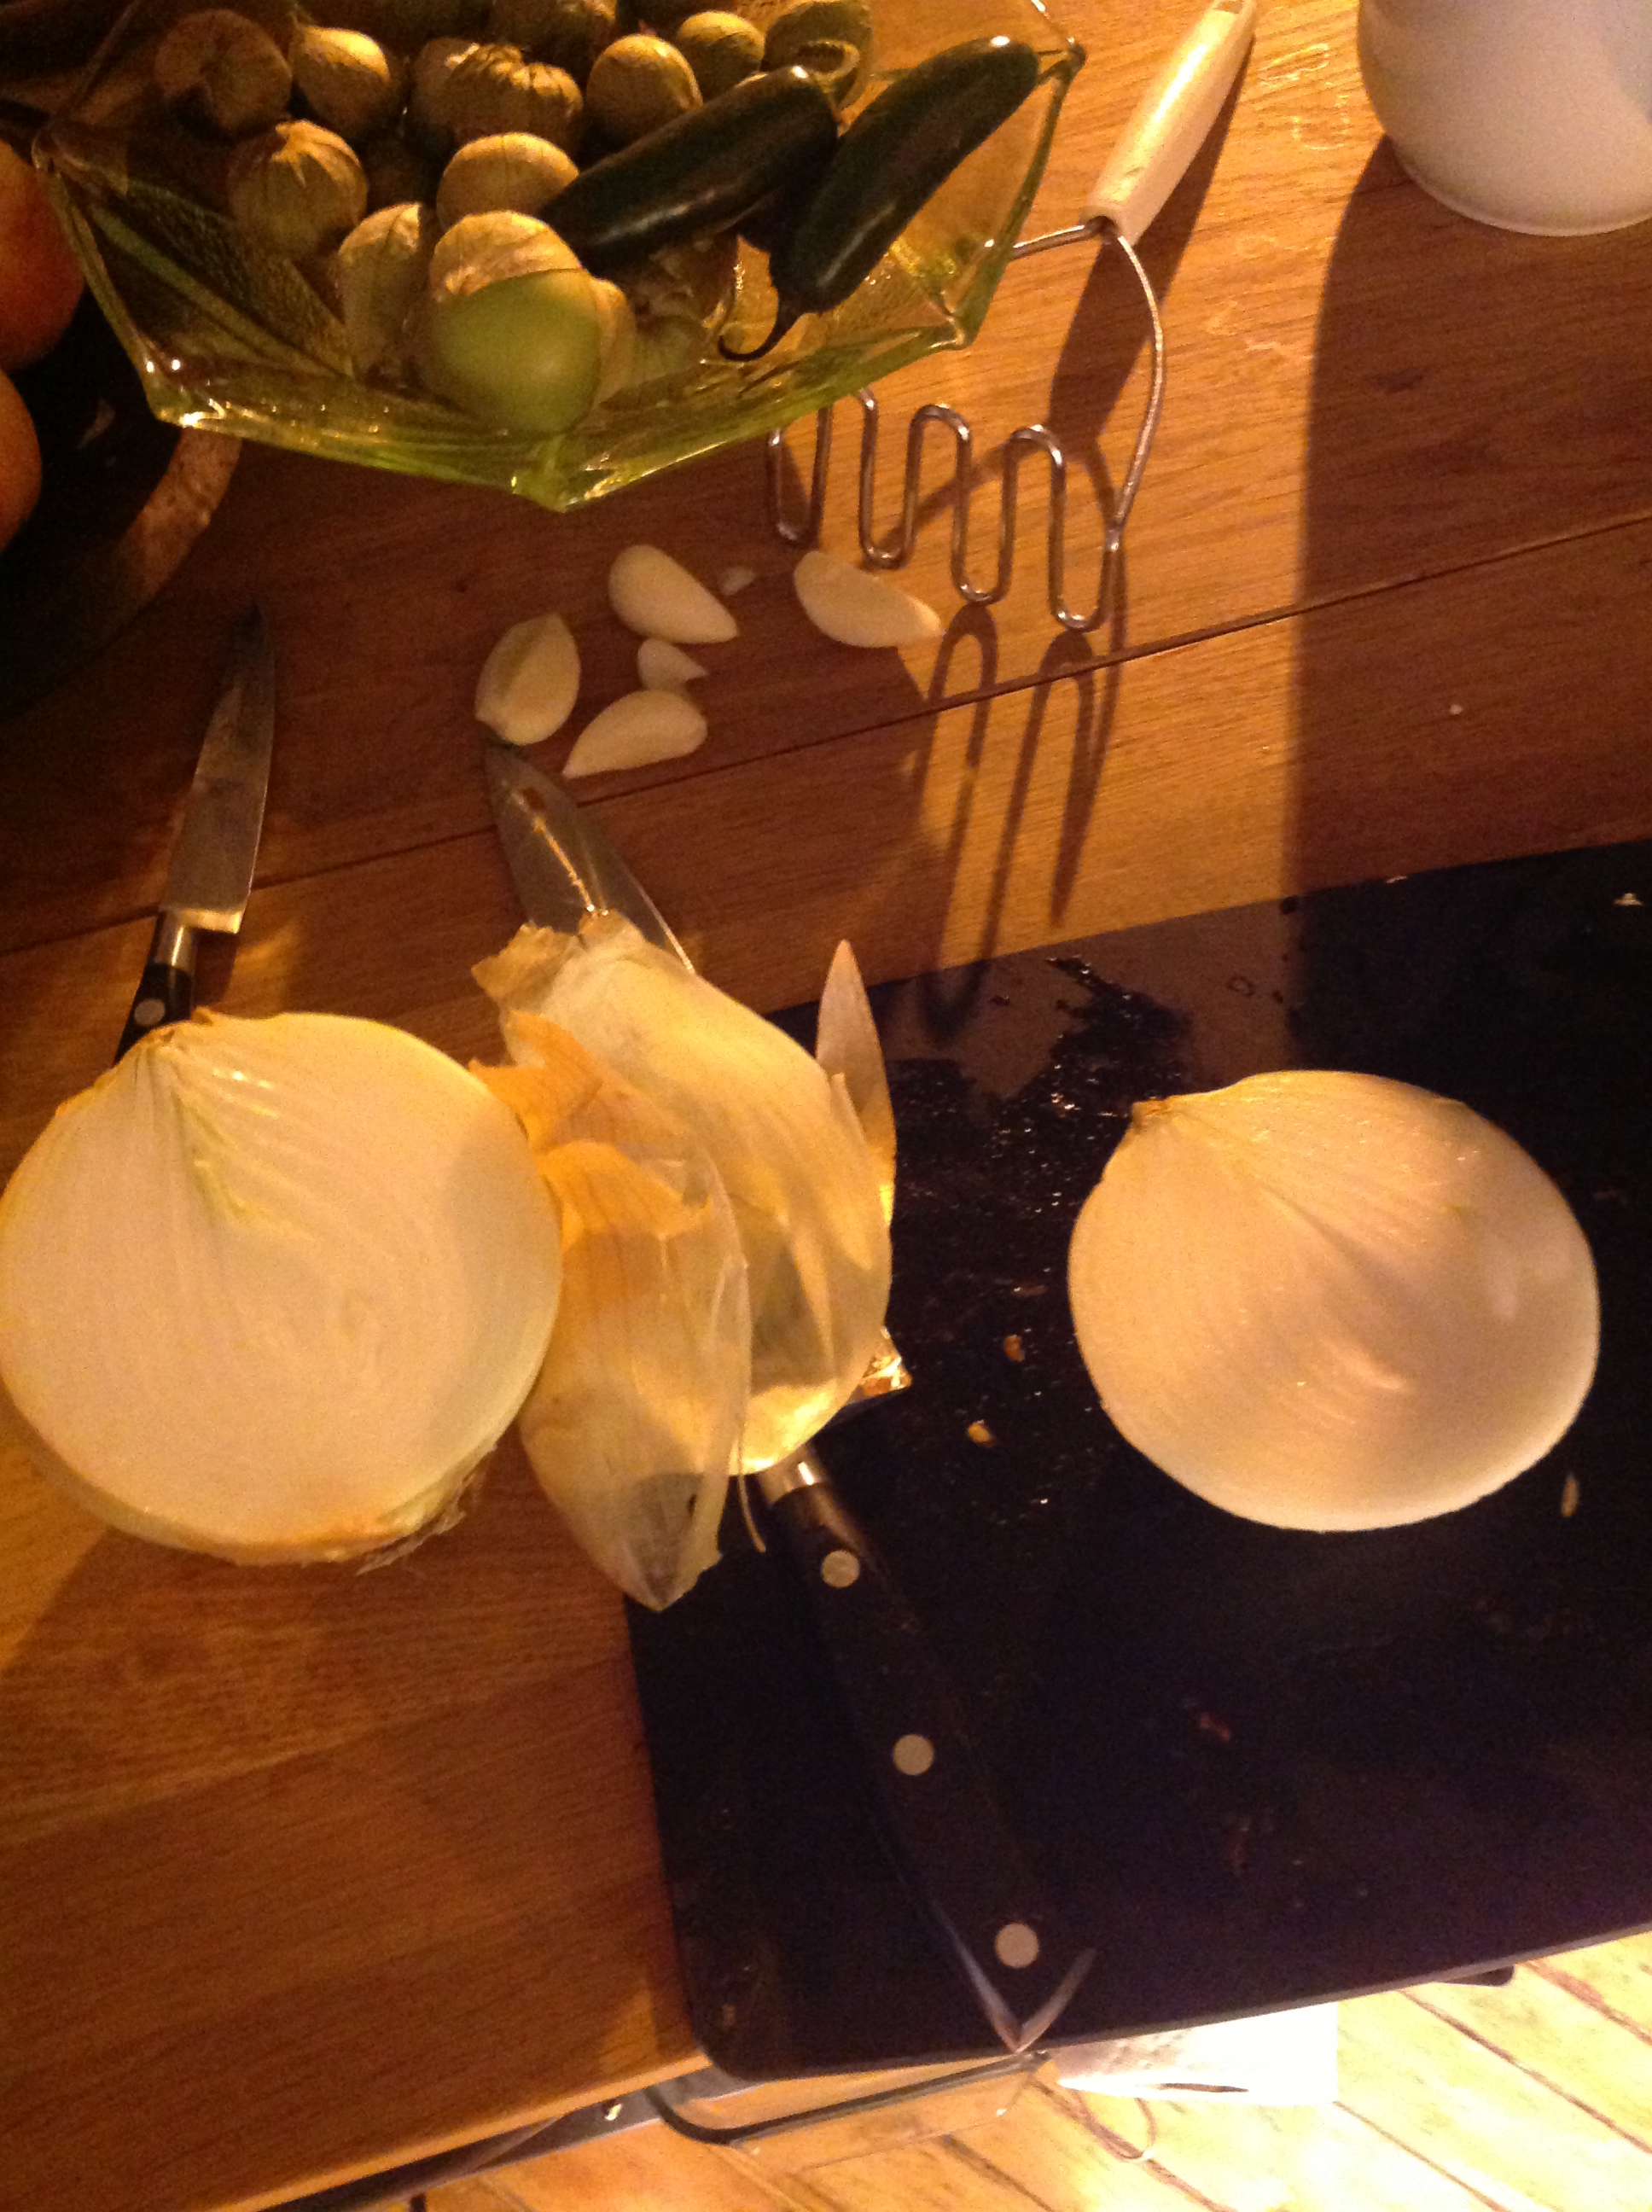
See how simple? A little bit of onion, a bulb of grated garlic and a potato masher.

Step 5: Heat sauce to a simmer and maintain the gentle boil. Stir occasionally and assess thickness- simmer longer to help reduce the liquid volume. When your optimal thickness is reached, remove from heat. This might take 30 minutes to an hour. Plenty of time to do your nails, wax your legs, pack a suitcase.

Step 6: Using oven mitts, empty out the boiling jars from their water bath and fill with sauce. Screw on lids and let cool on rack at room temperature to seal.

Makes: 2 1/2 jars (seems like not a lot of sauce, makes one appreciate homemade Italian sauce…..) The half-filled jar will have to be consumed within one week or frozen. Sealed jars will keep for months.

Jars

These are liquid gold in our home. I’ve since made this sauce recipe again and it was just as delicioso.

large pot

Look at the size of this sauce pot! This one also does my lobster boils, poultry stock, you name it.

5 Comments

Filed under All Recipes, Uncategorized

In case you forgot the pleasures of homemade lemonade

As I scurry around trying to get the “To Do list” checked off so I can leave for the cottage I thought I would leave you with a lemonade recipe which I made for the first time (this heat wave) for the foodnetwork.ca blog.  And you should try it too.

Because it is so very, very easy.  We’re talking the juice of 2 (maybe 3) lemons.  Add water.  You can sweeten with sugar but make a batch of simple syrup and it will last you jugs of lemonade into the future.   And it is delicious.  I used 6 tablespoons simple syrup (infused with spearmint leaves) for 2L lemonade and it took the sharp edge off but kept a refreshing tartness.

Here’s the recipe.  The full on directions with photos will be featured on my Family Fun blog.   With the simple syrup instructions too if you need them.

And PS–yesterday morning a real estate woman who was canvassing the ‘hood rang my doorbell and  looked just melty from the heat and I was able to say, “I just made lemonade.  Could I get you a glass?”.   How often does a gal get to say, “I just made a batch of fresh lemonade?”  Unless you’re in the South.   Sookie Stackhouse offers lemonade.  Though not to vampires obviously— but even to enemies.  But not enemy vampires.  Hmm, it gets tricky.

Ingredients for Lemonade

2-3 Lemons

2 L cold water

6 tbsp simple syrup

Juice the lemons til you have 1/2 cup juice. Add to 2 L cold water. Sweeten as desired with simple syrup (or super fine sugar).

Here is my Chef Basics video on making Simple Syrup if you are interested. (just re-watched it, informative but I’m very serious in it.  Simple syrup is no joke people.)

3 Comments

Filed under All Recipes, Uncategorized

Weekend Fluff: Make Marshmallows

Just when you think, “what could be more fun than doing nothing on the weekend” along comes some food blogger to tell you to make marshmallows.  Yes, I know, you can buy  marshmallows at WalMart or the gas station but there is nothing like the satisfaction (and an odd comfort) of making these at home and realizing  you can replicate the texture and and lightness of the industrially manufactured confection from your childhood—but they taste way better.  (You can even delight in squashing these between your fingers and making “ghost gum” –anyone know what I’m talking about?)

These were rolled in coconut.

Homemade marshmallows are more beautiful and delicate than the packaged masses.  They also have real flavour since you can add fragrant vanilla beans (or puréed fruit) and drop in a subtle hint of food colouring to help match any baby shower, bridal shower, man-cave christening or home campfire you’re planning on hosting.

And making them successfully in your own kitchen provides the same kind of fun and slight MAGIC as  when you pop your own popcorn in a pot on the stove.

Plain vanilla bean batch.

I made these from a recipe in Chris Nuttall-Smith’s Man Vs Marshmallow piece in the Globe and Mail recently (which tells you about the origins of mallows and has a great tip about calibrating your candy thermometre).  Just imagine the thrill of  making sea-salt caramel marshmallows or a butter-rum version.  Which I have not yet done but plan on using to kick   bake sale ass at Felix’s school (rum makes the pre-schoolers feel like pirates, fun!!)

This stuff feels pretty cool. Opposite end of the spectrum of homemade playdough.

Yes, I am going to keep showing you pictures until I wear you down.  Believe me, I can keep going, this is the age of endless digital photography.

Finally then, here’s the recipe as adapted from  Marshmallow Madness! by Shauna Sever.   The book includes a tonne of amazing variations on the species–including the buttered rum variety mentioned above.  And BTW, this looks lengthy, but it’s not complicated, just detailed to make sure yours turn out perfect. Just dive in, you’ll be fine.  YOU MUST HAVE A STAND-MIXER FOR THIS RECIPE.

If you want some coaching, here’s the video version of How to Make Marshmallows.

I can fit 14 in my mouth at once, you?

Classic Vanilla Marshmallows

One important tip—don’t trust the measurements on the package of your powdered gelatin.  Measure the powder yourself with a teaspoon.

Have everything ready before you start as once the syrup reaches the right temperature you have to be ready with all the other ingredients in the mixer.

Ingredients

COATING

1 cup icing sugar

2/3 cup cornstarch

BLOOM

4 ½ teaspoons unflavoured powdered gelatin

½ cup cold water

MALLOW

¾ cup sugar

½ cup light corn syrup (divided)

¼ cup water

1/8 tsp salt

2 tsp pure vanilla extract

Method:

  1. Make the coating first.  You’ll have enough to use for a couple batches. Sift the icing sugar and cornstarch into a bowl and whisk together.  You want to eliminate any lumps. Set aside.
  2. Spray an 8” X 8” inch pan with no-stick spray. Set aside.
  3. Now bloom your gelatin.  Measure a 1/2 cup cold water into a small bowl and sprinkle the powdered gelatin on top.  Whisk it well and let sit for at least 5 minutes to soften.
  4. Meanwhile for the mallow mixture, measure the sugar, ¼ cup corn syrup, water and salt into a small saucepan.  Set over high heat and bring to a boil until it reaches 240 °F on a candy thermometer.  Stir occasionally.
  5. While the syrup is heating, pour the remaining ¼ cup corn syrup into the bowl of a stand mixer.  Microwave the gelatin for 30 seconds to ensure it’s fully melted and add that to the mixer bowl.  With the whisk attachment on set the mixer to low and keep it running.

TIP: Don’t forget to keep checking your syrup—make sure your thermometer doesn’t touch the bottom of the pan when testing the temperature.   And remember that boiling syrup is extremely hot so take care to keep it from splattering. 

  1. Once the temperature hits 240 °F slowly pour the sugar mixture into the mixing bowl.  Increase the speed to medium and beat 5 minutes.  Then increase speed to medium-high and beat another 5 minutes.  Finally, pause to add the vanilla and beat for 1-2 minutes on the highest speed until white and thickening.
  2. The marshmallow mixture will be very fluffy-about triple the volume and will now start to set very quickly.  Pour into the greased 8 x 8 dish and smooth with an offset or spatula.
  3. Sprinkle the top generously with the marshmallow coating and let the marshmallow set in a cool, dry place for 6 hours before cutting.
  4. Once set, run a knife around the edge of the dish and flip the mellow slab onto a surface dusted with the marshmallow coating.

10. Now just slice the marshmallows into cubes (or cut using scissors or cookie cutters sprayed with non-stick spray).

11. Toss them in the coating to cover all the sticky sides and serve.

12. Store in a dry cool place and just redust the marshmallows if they get a little moist.

VARIATION: You can also coat your marshmallows with finely ground nuts like pistachio, shredded coconut or graham crumbs.

COLOUR:  Drop in a bit of food colouring just before you beat the marshmallow for the final 2 minutes.

9 Comments

Filed under All Recipes, Cookbooks, Magazines (+recipes from), Uncategorized

Skip the carton, Make a Pitcher of Homemade Nog

One serving appears more ladylike when divided into three small glasses.

Today is the day we decorate our tree.  The Christmas Tree is my favourite part of the holidays.  As unexcited as I am to dig through the pile of boxes in the basement on the annual ornament hunt (why do I have two bins of Easter decorations?  Really?) I am pretty psyched to get the tree going.

Thinking that many of us might be putting up lights, Christmas shopping or lamenting the start of carols on the radio, I figured egg nog and alcohol could settle us right down.  Cursing also helps immensely.

If you’re going out for the weekend grocery shop, you only need  few ingredients to make your own egg nog: eggs, milk, cream, sugar. (I know! Why have you not done this before?)

My friend swears by the Mac’s Milk version (and I too admit to glugging the store-bought) but this is lighter, frothier and fresher and really a cinch to make.

HERE IS THE LINK TO MY CHEF BASICS  EGG NOG MAKING VIDEO.

Once this becomes your signature holiday drink–you can move onto your own egg nog serving set.

.

EGG NOG RECIPE

Make sure you use the freshest eggs possible and have an alternate beverage available for guests like pregnant woman, children or the elderly who shouldn’t consume raw eggs.

Servings: 6

Prep Time: 15 minutes

Ready In: 45 minutes (includes 30 minutes cooling)

Ingredients

4 eggs, separated

1/3 cup sugar (reserve 1 tablespoon)

2 cups whole milk

1 cup whipping cream

fresh grated nutmeg

pinch salt

Method

With an electric beater whisk together egg yolks and sugar until sugar dissolves and yolks are pale and fluffy. Add milk, cream and nutmeg and whisk until well combined. Refrigerate until cold.

Just before serving whisk egg whites (at room temperature) and a pinch of salt to soft peaks. Add teaspoon of sugar and whisk until firm peaks.

Fold into eggnog to make it extra light and fluffy.

If you want to add alcohol you can whisk in 2 to 3 ounces of bourbon or rum before adding the egg whites.

Another opportunity to use my beloved nutmeg grater. (purse size convenience!)

11 Comments

Filed under All Recipes, Blogs with cooking tips, Ruminations on the Edible, Uncategorized